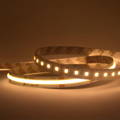
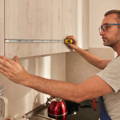
I had this dimmable driver installed for my kitchen cabinet led strip lights. The original driver stopped working after about 2 years and I contacted support as this is warrantied for 6 years. Mr. Meden provided exceptional service and support in getting the replacement shipped to me in no time.
Fantastic people. I'm a Happy Customer.
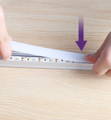
These connectors make reliable LED tape light connections and simplify the tape light installation process. If you are installing gel coated tapes, be sure to gently scrape the tape contacts untill they shine. Otherwise, the gel residue acts as an insulator. - (Hitlights Amazon Store)
Beware the somewhat misleading descriptors used for these lights. While the 3000K option is described as “Warm White” and 2700K as “Soft White,” in fact, 3000K to these eyes has nothing to do with warm. It’s a cool, neutral light that reads bluish-white at night. We were looking to replace old “rope lights” from maybe 15 years ago that gave off a truly warm, incandescent glow. After doing some post-installation research, I now see that if you’re looking for a warm incandescent lighting effect, go for 2700K, whatever it’s called by the vendor. Why the warmer, in fact, warmest (2700K) light is called “soft” rather than “warm” and the cooler (3000K) is called “warm” is, frankly, beyond me. Caveat emptor!
Hi JPnyc,
Thank you for your recent purchase from Hitlights. We regret to hear that your purchase did not meet your expectations, and for this, we extend our sincerest apologies. Ensuring the quality of our products is most important to us, and thank you for giving us the opportunity to do better.
Our team reached out and left a voice message to address your concern. Should you need further assistance, please do not hesitate to call us back.
Best regards,
HitLights Team


