Table of Content
Introduction
Installing LED strip lighting is a smart, energy-efficient way to enhance your home's overall look, accent features, or workspace lighting. But while these flexible lights are often considered low-risk, overlooking safety can lead to electrical issues, fire hazards, or long-term damage. Whether you’re a DIY enthusiast or a first-timer, following a comprehensive LED strip installation checklist is essential for ensuring LED strip lighting safety at every stage.
In this guide, we’ll walk you through the critical safety steps—from planning to post-installation—plus tips on choosing reliable LED strip manufacturers that meet safety and quality standards.
Why LED Strip Lighting Safety Matters
LED strip lighting operates on low voltage, usually 12V or 24V DC, giving the illusion of minimal risk. However, improper installation or poor-quality products can cause real problems. Understanding these risks ensures your lighting project is not only stunning but also safe.
1. Electrical Risks
Despite being low voltage, LED strips can still draw significant current, especially in high-lumen applications or longer runs. If connected to an inadequate power supply or poorly insulated wires, you risk overheating, sparking, or even electrical fires.
2. Fire Hazards
Incorrect installation near flammable surfaces (like wood paneling or fabric) without heat management can lead to heat buildup. This is especially true if you use adhesive mounting with poor thermal dissipation or bundle multiple strips closely.
3. Health and Safety Concerns
Improper brightness, flickering lights, or harsh color temperatures can lead to eye strain, headaches, or even interfere with sleep patterns. Using dimmers and the right light color (2700K to 4000K for warm spaces) helps maintain visual comfort.
Pre-Installation Safety Checklist
Before you even cut your first strip or plug in a power adapter, it’s critical to do some safety prep.
✔ Assess Power Requirements
Calculate the total wattage of your LED strip setup. Multiply the wattage per meter by the total length and add 20% overhead to avoid overloading. For example, a 5-meter strip rated at 14.4W/m requires at least a 90W power supply.
✔ Select Quality Components
Not all LED strips are created equal. Cheap knockoffs might lack short-circuit protection, thermal regulation, or safe coatings. Choose high-quality strips, preferably from reputable LED strip manufacturers with solid reviews, UL certifications, or RoHS compliance.
✔ Plan Installation Location
Know whether the area is dry, humid, or exposed to splashes. Use waterproof-rated (IP65/IP67/IP68) LED strips in kitchens, bathrooms, or outdoors. Also, ensure the installation surface is clean, dry, and smooth for secure adhesion.
LED Strip Installation Checklist
Now that you’re prepped, here’s your step-by-step LED strip installation checklist to ensure everything goes smoothly and safely.
✔ Match Power Supply to Strip Voltage
Most LED strips are 12V or 24V—never connect a 12V strip to a 24V power source. Always double-check voltage compatibility between your LED strips and drivers.
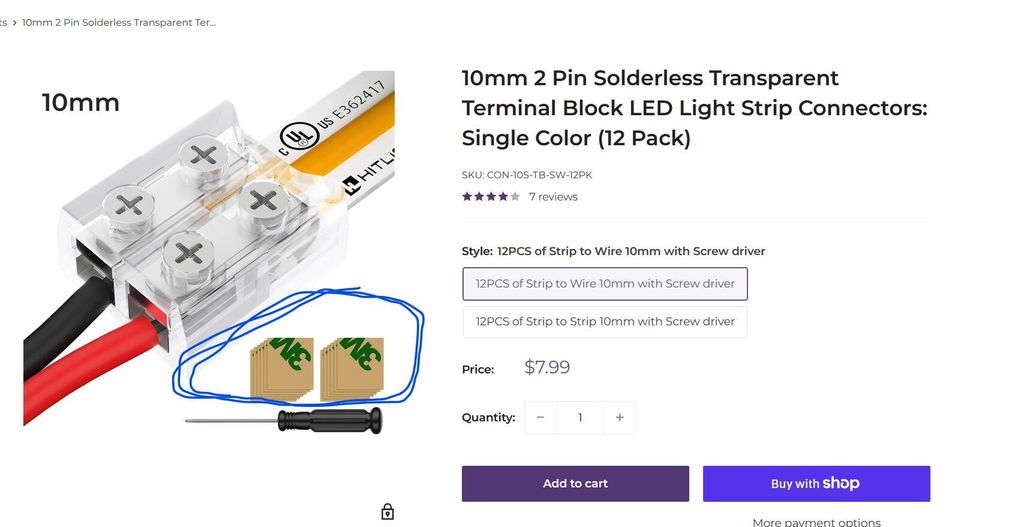
✔ Use Proper Connectors
Avoid DIY soldering unless you're experienced. Instead, use certified connectors that maintain good contact and insulation. Poor connections can cause overheating or flickering.
✔ Fuse Protection & Surge Guards
Integrate an inline fuse or surge protector between your power supply and the strip to prevent damage from voltage spikes or surges—especially important in older homes.
✔ Avoid Overloading Circuits
If your lighting project is extensive, don’t power everything off one driver. Break up the setup into zones with their own power sources. Overloaded power supplies can fail or cause excessive heat.
✔ Mount with the Right Materials
Use heat-dissipating aluminum channels or profiles rather than sticking strips directly to surfaces. This prevents overheating and prolongs LED lifespan.
Post-Installation Safety Practices
The job doesn’t end once your lights are glowing. Regular maintenance ensures LED strip lighting safety long-term.
✔ Schedule Periodic Inspections
Check for signs of wear, overheating, or discoloration in the LED strips and connectors every few months. This helps catch potential fire hazards early.
✔ Manage Heat Buildup
Over time, even low-voltage LEDs generate heat. Use LED strips in ventilated areas or install a cooling mechanism, especially in enclosed spaces.
✔ Watch for Flickering or Dimming
Persistent flickering can indicate loose connections or a failing driver. Don’t ignore these signs—troubleshoot immediately to avoid further issues.
Common Mistakes to Avoid During LED Strip Projects
❌ Skipping Voltage Calculations
Underestimating power draw is a common error. Overloaded circuits or mismatched power supplies can lead to early failure or hazardous overheating.
❌ Using Low-Quality Products
Non-certified or generic LED strips may save money upfront but often lack safety features. Stick with known LED strip manufacturers that provide data sheets, warranties, and certifications.
❌ Ignoring Manufacturer Instructions
Even if you're experienced, always follow product-specific guidelines. Not all strips have the same mounting, voltage, or cutting instructions.
How to Choose Trustworthy LED Strip Manufacturers
Choosing a reputable manufacturer reduces the risk of product failure and enhances safety from the start. Here’s what to look for:
✅ Product Certifications
Look for UL, CE, FCC, or RoHS marks. These indicate compliance with electrical and environmental safety standards.
✅ Transparent Specifications
Reputable manufacturers provide clear product specs—lumens, color temperature, voltage, IP rating, and warranty details. Avoid vendors with vague or incomplete information.
✅ Customer Support & Warranty
Good manufacturers offer at least a 1–3 year warranty and accessible support for questions or replacements. This indicates confidence in product quality.
✅ Strong Reviews & Reputation
Check third-party reviews on sites like Reddit, Trustpilot, or LED forums. Brands with a solid track record for reliability are far safer to use in long-term installations
Conclusion
LED strip lighting projects can transform any space, but safety should never be an afterthought. From power planning to proper installation and post-installation checks, every step matters. Following a comprehensive LED strip installation checklist ensures your lighting is not only beautiful but also secure and long-lasting.
Prioritize LED strip lighting safety by choosing reliable components, following best practices, and purchasing from certified LED strip manufacturers. A few extra precautions today can save you from serious hazards tomorrow.
About HitLights:
HitLights is a leading provider of high-quality LED lighting and low voltage LED drivers, and mounting supplies catering to diverse needs in residential, commercial, and event settings. With a commitment to innovation, eco-friendly lighting, and customer satisfaction, HitLights continues to illuminate spaces with innovations be it micro or macro technology.
By the way, if you are a professional installer, an integrator, or a business owner and you want to: Save MORE! And Do MORE Projects!
Get Factory Direct Pricing when you join our Professional Partner Program RISK-FREE, NO CONTRACTS, NO HASSLE PROCESS there is nothing to lose but MORE to GAIN!
If you have any additional questions, feel free to reach out to us at customerservice@hitlights.com or give us a call at 1 (855) 768-4135. Our team of expert engineers and electricians are here to assist you every step of the way!
*Disclaimer: The information provided in this article is for general informational purposes only.