Table of Content
Introduction
LED strip lights have revolutionized home, commercial, and automotive lighting, offering flexibility, energy efficiency, and customizable ambiance. Whether you're lighting under cabinets or outlining architectural features, installing LED strips requires reliable electrical connections. Here’s where two options arise: soldering the wires or using a solderless connector like an LED strip connector.
Both methods have pros and cons. This comprehensive guide breaks down the differences, helping you decide which connection method is best for your needs.
Understanding LED Strip Connections
Before diving into techniques, it’s essential to understand the nature of LED strip lights. These flexible circuits come with embedded LEDs and copper contact pads. To power them, users must link sections using connectors or wire leads, especially when cutting the strip to fit corners or split runs.
A secure connection ensures:
- Steady power supply across the strip
- Consistent light output without flickering
- Long-term durability and safety
The goal is to achieve a seamless, safe, and efficient lighting setup — whether via solder or a solderless LED strip connector.
What Are Solderless Connectors?
Solderless connectors, also known as LED strip connectors, are pre-designed components that allow users to link LED strips without the need for a soldering iron. They usually involve a clip-on mechanism that clamps over the copper pads on the LED strip, ensuring electrical contact.
Types of LED Strip Connectors:
- Gapless Connectors: Provide clean, straight-line connections
- L-Shaped Connectors: Ideal for 90-degree turns or corners
- T-Shaped or X-Shaped Connectors: Useful for branching LED lines
- Pigtail Connectors: Include short wire leads for extending or linking to power supplies
Pros of Solderless Connectors:
- No tools or soldering required
- Quick to install — ideal for beginners and DIYers
- Reusable in many cases
- Available in waterproof variants
Cons:
- Potential for loose connections over time
- Bulkier than solder joints, which may affect aesthetics in tight spaces
- May not support high current loads as reliably as soldered joints
|
|
|
|
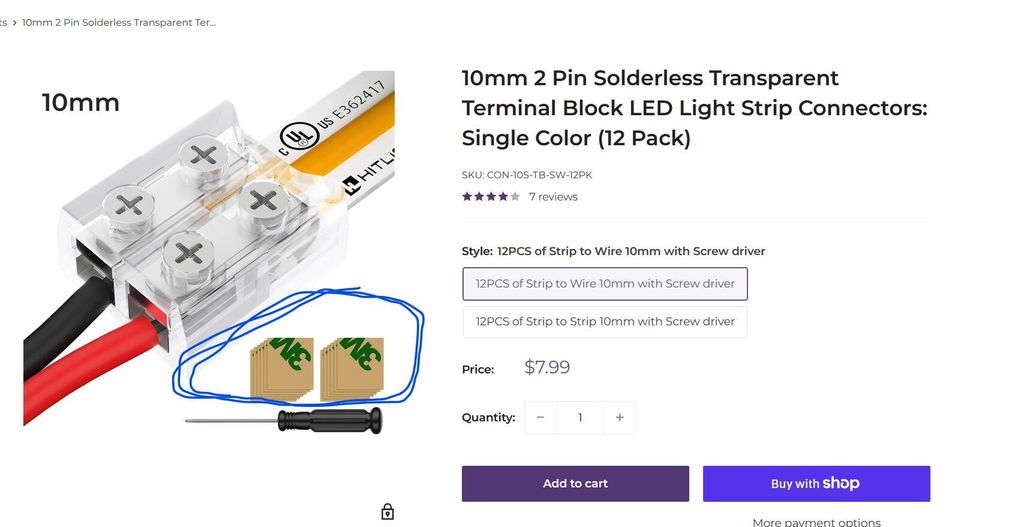
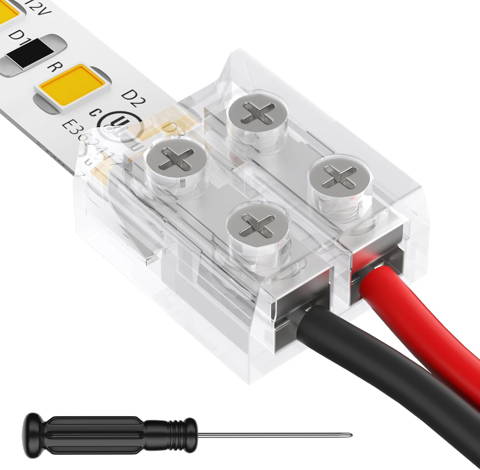 Terminal block connector
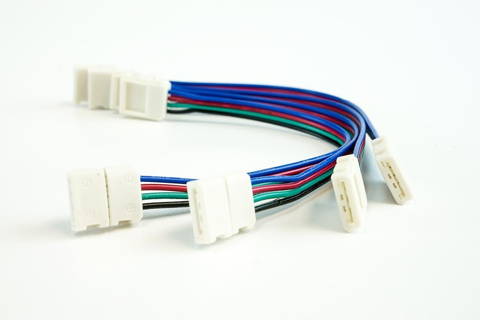 RGB Connector and Extension
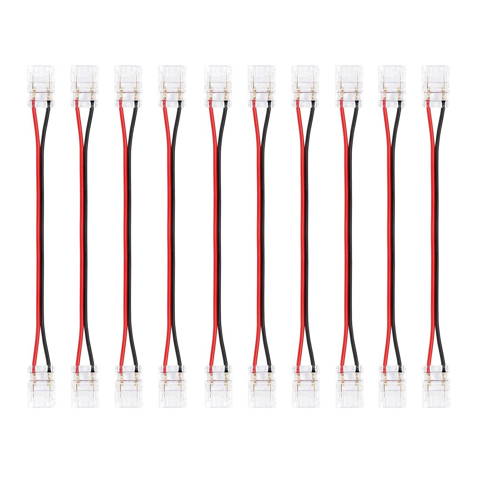 Single Color Connector and Extension
Soldering LED Strip Lights: The Traditional Method
Soldering is the process of melting metal (typically tin-based solder) to bond wires or terminals directly to the strip’s copper pads. It requires a soldering iron, flux, and steady hands — but offers unmatched precision.
Benefits of Soldering:
- Extremely reliable and secure connection
- Slim and discreet joints — great for design-focused applications
- Handles higher power loads with ease
- Resistant to movement, vibration, or outdoor wear
Drawbacks:
- Requires tools and practice — not beginner-friendly
- Time-consuming, especially on large projects
- Risk of damaging the LED strip if done improperly
- Permanent — not easily adjustable or removable
Solderless Connectors vs Soldering: A Detailed Comparison
| Factor | Solderless Connector | Soldering |
| Ease of Use | Plug-and-play; no skills needed | Requires soldering tools and experience |
| Installation Time | Fast; ideal for quick setups | Slower; especially for multiple connections |
| Durability | Good, but may loosen over time | Excellent; extremely secure and long-lasting |
| Aesthetic | Slightly bulkier; visible clips | Clean, flat, and minimal |
| Flexibility | Easily adjustable or replaceable | Permanent unless desoldered |
| Cost | Low to moderate per piece | Low cost if you already have tools |
| Best Use Case | DIY, temporary setups, tight deadlines | Professional, permanent installations |
When Should You Use Solderless Connectors?
Solderless connectors shine (literally and figuratively) in specific situations:
DIY Home Projects: Perfect for non-technical users who want to add ambient lighting to shelves, TVs, or bedrooms.
Temporary Installations: Useful for rentals, events, or seasonal decorations where reversibility is important.
Quick Fixes: If an LED strip segment stops working, connectors can bridge gaps without full rewiring.
Tight Deadlines: You can finish a complete install in minutes using just a pair of scissors and your fingers.
When Is Soldering the Better Choice?
Soldering is worth the extra effort in cases where reliability, power, and aesthetics are top priorities:
Outdoor or Industrial Environments: Where weatherproofing and vibration resistance matter.
Architectural or Commercial Installations: Where consistent power and long-term performance are critical.
Custom Builds: Such as cars, PCs, or complex smart lighting setups with high amperage.
Invisible Connections: When you need minimal visual clutter, such as behind glass or under translucent covers.
Tips for Choosing the Right LED Strip Connector
If you choose the connector route, getting the right one is key. Here’s what to consider:
Voltage Compatibility: Ensure the connector matches your strip’s rating (e.g., 12V or 24V).
Pin Configuration: Most LED strips are either 2-pin (single color), 4-pin (RGB), or 5-pin (RGBW).
IP Rating: For outdoor use, look for waterproof connectors with an IP65 rating or higher.
Strip Width: LED strips come in 8mm, 10mm, and wider — match accordingly.
Quality Over Price: Cheaper connectors often wear out quickly or don’t grip securely.
Common Mistakes to Avoid
Misalignment: Whether soldering or clipping, misaligned pins will lead to flickering or failure.
Incompatible Connectors: Not all connectors fit all LED strip types — double-check specs.
Forgetting to Seal Outdoor Connections: Always use heat shrink tubing or silicone gel for outdoor joints.
Cutting in the Wrong Spot: Only cut LED strips at the marked copper pad lines.
Not Testing First: Before installing permanently, always test your connections and light output.
Conclusion
Both solderless connectors and soldering offer reliable ways to connect LED strip lights — but the right choice depends on your skill level, project scope, and desired permanence.
- For fast, easy, and flexible installations, go with LED strip connectors.
- For professional, high-load, or permanent setups, choose soldering for its unmatched reliability.
Ultimately, the best results come from understanding your project needs — and selecting the method that balances performance, aesthetics, and convenience.
About HitLights:
HitLights is a leading provider of high-quality LED lighting and low voltage LED drivers, and mounting supplies catering to diverse needs in residential, commercial, and event settings. With a commitment to innovation, eco-friendly lighting, and customer satisfaction, HitLights continues to illuminate spaces with innovations be it micro or macro technology.
By the way, if you are a professional installer, an integrator, or a business owner and you want to: Save MORE! And Do MORE Projects!
Get Factory Direct Pricing when you join our Professional Partner Program RISK-FREE, NO CONTRACTS, NO HASSLE PROCESS there is nothing to lose but MORE to GAIN!
If you have any additional questions, feel free to reach out to us at customerservice@hitlights.com or give us a call at 1 (855) 768-4135. Our team of expert engineers and electricians are here to assist you every step of the way!
*Disclaimer: The information provided in this article is for general informational purposes only.