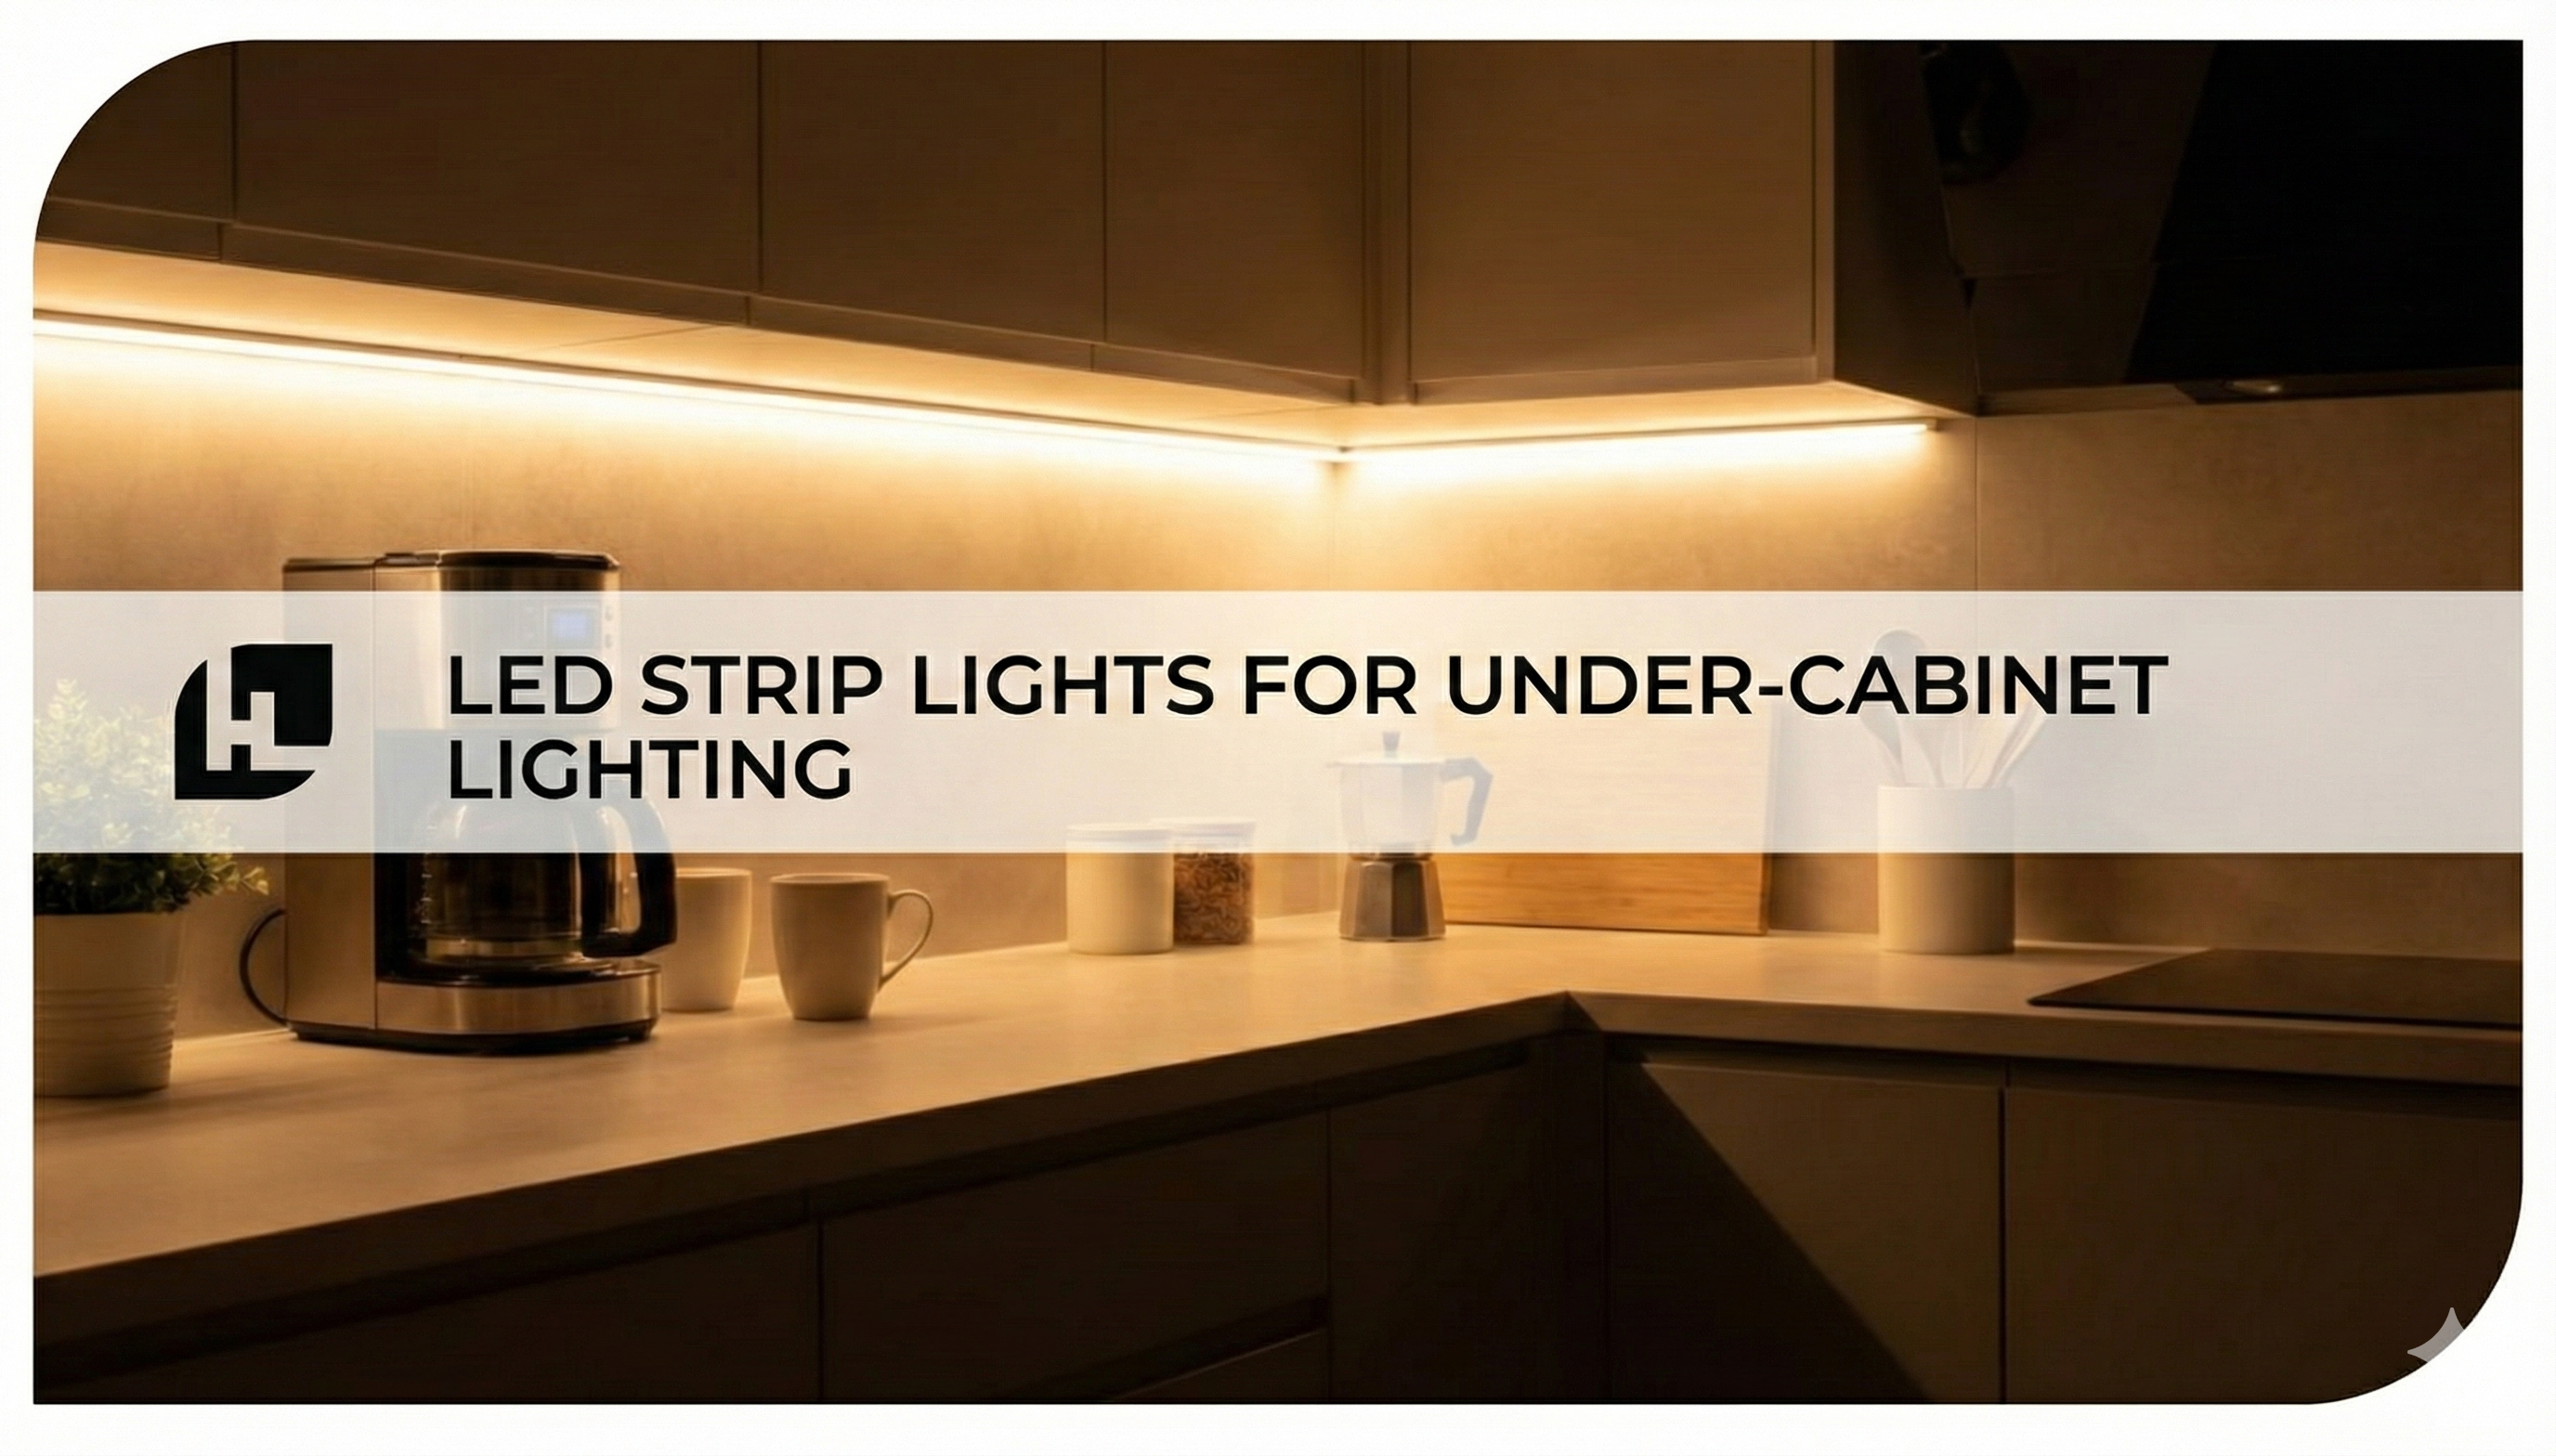
- What Are the Best LED Strip Lights for Kitchen Cabinets?
- How Do You Install Under Cabinet LED Strip Lights?
- What Are the Best Under‑Cabinet Lighting Ideas for Task and Accent Lighting in Kitchens?
- Why Choose UL‑Listed and High‑Quality LED Strip Lights for Under‑Cabinet Lighting?
- What Are Common FAQs About LED Strip Lights for Under‑Cabinet Lighting?
LED Strip Lights for Under‑Cabinet Lighting: How to Choose, Install, and Customize for Kitchen Cabinets
Under‑cabinet LED strip lighting gives focused task light, lower energy use, and clean accent illumination that lifts both the look and function of a kitchen. This guide covers what under‑cabinet lighting does, why low‑voltage LED tape is usually the best choice for cabinets, and how to select, install, and tailor strips to different cabinet styles and design goals. Whether you’re a homeowner or a pro, you’ll learn how COB and SMD differ, how to size and wire drivers, and which dimming and smart controls offer the most reliable performance. We walk through product selection, step‑by‑step installation, dimming and smart options, practical task vs. accent design ideas, and essential safety considerations like UL‑listing and energy efficiency. You’ll also find SKU‑style comparison tables, wiring guidance for matching drivers, clear numbered installation steps, and concise checklists for color temperature, lumen targets, and mounting accessories.
What Are the Best LED Strip Lights for Kitchen Cabinets?
Under‑cabinet lighting performs best when the strip matches the job: choose seamless, dot‑free coverage for low‑glare accent work or high‑density output for serious countertop tasks. COB strips create a continuous light plane that hides individual LEDs and reduces glare—ideal for shallow valances and visible details. High‑density SMD strips (for example, 2835 HD) deliver higher lumens per foot and are better when you need strong task illumination; 400–700 lumens per foot is a useful target for prep zones. Pay attention to voltage (12V vs. 24V), CRI, and Kelvin so color and brightness stay consistent for the run length you need.
If you need a quick rule of thumb: pick COB when seamless appearance matters, and high‑density SMD when raw task brightness is the priority. For runs and wiring, 24V systems let you run longer lengths with less voltage drop; 12V is simpler for short runs and many retrofits. Aim for CRI 90+ in kitchens where accurate color matters, and always check for UL‑listing to satisfy safety and code requirements.
Use the table below to compare common product attributes and help match optical and electrical needs to your project.
| Product Type | Typical Lumens/ft | Watts/ft | Voltage | CRI / Kelvin |
|---|---|---|---|---|
| COB LED Strip (Premium 24V COB LED Strip Light) | 250–450 lm/ft | 4–8 W/ft | 24V | CRI 90+, 2700K–4000K |
| High‑Density SMD (e.g., 2835 HD) | 400–700 lm/ft | 6–12 W/ft | 24V | CRI 90+, 3000K–4000K |
| Standard Density SMD (Single Color) | 150–300 lm/ft | 2–5 W/ft | 12V/24V | CRI 80–90, 2700K–4000K |
This comparison shows the trade‑offs: COB gives a dot‑free, low‑glare appearance while high‑density SMD offers higher lumen output for demanding countertop tasks. When matching strips to drivers and mounting hardware, consider voltage and run length to keep brightness uniform and ensure long‑term reliability.
Quick selection guidance:
- COB LED strips: Best for seamless accent work, valances, and minimalist looks where visible LEDs would distract.
- High‑density SMD strips: Best for task zones that need higher lumen output and more directional light for chopping and detailed prep.
- Standard density SMD / single color: Best for budget installs and short runs where moderate brightness is acceptable.
HitLights supplies high‑quality LED lighting products, expert technical support, and contractor partnerships to help projects succeed.
How Do COB and SMD LED Strip Lights Compare for Under Cabinet Use?

COB (Chip‑on‑Board) arrays place many chips close together on the PCB so the light blends into a smooth plane, reducing visible dot patterns and producing an even wash—particularly effective behind diffusers or inside aluminum channels. COB tends to create fewer specular highlights on glossy surfaces and benefits from good heat sinking; pairing COB with aluminum channels improves lifetime and color stability. The downside is that extremely high lumen densities are often more cost‑effective with high‑density SMD. Choose COB when appearance and uniformity are the priority.
For long runs and higher wattage installs, account for thermal management and driver selection to reduce heat‑related lumen depreciation. Those considerations lead naturally to the Kelvin and lumen targets recommended for typical kitchen tasks below.
Which Color Temperatures and Brightness Levels Are Ideal for Kitchen Cabinets?
Pick color temperature and lumen density by role: warm accent, neutral task, or tunable white for multi‑use kitchens. For task work, 3000K–4000K with CRI 90+ preserves color accuracy for food prep and ingredient matching while keeping a neutral look with common countertops. For accent lighting, 2700K–3000K provides a cozier glow. Aim for roughly 400–700 lumens per foot for focused prep zones and 150–300 lumens per foot for ambient or accent runs; lower densities help limit glare on reflective surfaces.
High CRI (90+) is important near prep areas and for showing true cabinet finish colors. These lumen and Kelvin targets guide wiring and driver choices to avoid voltage‑drop dimming at the far end of a run.
How Do You Install Under Cabinet LED Strip Lights?
Good installation starts with planning: measure each run, map power access, and total the wattage so you can choose a driver with 20–30% headroom. Mounting options include adhesive backing, aluminum channels with diffusers, and mechanical clips—the best method depends on cabinet geometry, depth, and finish. Follow wiring best practices: keep runs within manufacturer limits to avoid voltage drop, use the correct wire gauge, and prefer parallel feeds over long serial strings when practical. Test strips with the driver before final adhesion to confirm polarity and color match and reduce rework.
A clear wiring and mounting plan reduces surprises on site and makes troubleshooting easier. For installers needing extra help, tools like power supply calculators and troubleshooting guides cut specification errors and save time. HitLights offers product choices, technical support, and pro resources to keep installations running ssmoothly.
Typical installer workflow:
- Measure and plan the run: total footage, power locations, and mounting method.
- Prepare surface and mounting channel: clean, degrease, and dry; cut aluminum channels if using them.
- Lay out strips and test: temporarily position strips, connect to the driver, verify brightness and color.
- Wire and secure: solder or use approved connectors, run proper gauge wire, and secure runs with clips or channels.
- Finalize and test: adhere strips, install diffusers, test dimming, and label circuits for service access.
What Are the Step‑by‑Step Instructions for Installing LED Strips Under Cabinets?
Start by measuring each cabinet run and marking power access points—accurate measurements prevent wasted strip length and unnecessary seams. Choose the mounting method: adhesive for flat undersides, aluminum channels where diffusion and heat sinking are needed. Cut channels to size and fasten with screws or high‑strength tape. Before final mounting, test the strips by temporarily connecting to the driver to confirm polarity and consistent color across sections. Make permanent connections with soldered joints or manufacturer‑approved connectors, install diffusers or channels, cycle the dimmer to verify smooth operation, and document wiring for future service.
Testing before final adhesion shortens install time and reduces callbacks. Next, choose and wire the correct power supplies and accessories for long‑term performance.
How Do You Choose and Connect the Right Power Supplies and Accessories?
Match the total strip wattage plus 20–30% safety headroom to a UL‑listed driver with the correct output voltage (12V or 24V) and the dimming protocol you need. Select connectors and cable gauge by run length: for 24V runs beyond about 10–12 feet, upsize conductors or provide multiple feed points to limit voltage drop. If you plan to dim, confirm the driver and controller share a protocol (PWM, 0–10V, or TRIAC/ELV) and that the driver supports the controller’s load range. Use IP‑rated connectors and sealants in areas exposed to steam or moisture to protect joints and extend life.
The table below pairs common driver specs with recommended strip lengths and use cases so you can choose the right supply and wiring approach quickly.
| Driver Model / Type | Output Voltage | Wattage | Dimming Protocol | Recommended Max Continuous 24V Strip Length |
|---|---|---|---|---|
| 24V Dimmable Driver (UL‑Listed) | 24V DC | 150 W | PWM / 0–10V | 25–30 ft (with single feed) |
| 24V Non‑Dimmable Supply (UL‑Listed) | 24V DC | 100 W | Non‑dimmable | 15–18 ft |
| 12V Dimmable Driver (UL‑Listed) | 12V DC | 60 W | TRIAC / PWM | 8–10 ft |
This table clarifies how driver wattage and dimming protocols affect practical run lengths and helps ensure safe matches between strips and power supplies. Choosing a driver with proper headroom and UL listing reduces thermal stress and extends LED life in professional installs.
HitLights provides a range of certified drivers, accessories, and pro resources to support reliable installations and partnerships with contractors.
What Features Should You Look for in Dimmable and Smart Under‑Cabinet LED Lighting?
Dimmability, protocol compatibility, and precise color control are the key features for smart and dimmable under‑cabinet systems that behave predictably. Match drivers and controllers to the dimming method you plan to use—TRIAC for line‑dimming in many homes, 0–10V for commercial control, and PWM or dedicated protocols for fine LED control—and verify both components are specified to work together to reduce flicker. Tunable white strips let you shift Kelvin from warm to neutral to support different tasks and moods, and high CRI options retain accurate color for food prep and cabinet finishes.
Smart integration depends on the ecosystem: Wi‑Fi offers easy cloud and voice control but can be affected by network congestion; Zigbee and Z‑Wave provide robust local mesh control for multi‑zone setups; proprietary RF can be simplest for plug‑and‑play installs. Choose controllers certified for your platform, sized for your load, and preferably with scene presets and smooth fades rather than abrupt steps. Consider controller placement, power availability, and thermal needs to avoid latency or intermittent control.
| Control Option | Compatibility | Best Use‑Case |
|---|---|---|
| TRIAC / ELV Dimming | Line‑dimming residential circuits | Simple wall‑dimmer replacement for single‑zone control |
| 0–10V Control | Commercial systems and lighting panels | Multi‑zone professional installs needing centralized control |
| Wi‑Fi / Cloud Controllers | Consumer smart‑home ecosystems | Remote access and voice control for small installs |
| Zigbee / Z‑Wave Controllers | Mesh smart‑home hubs | Reliable local control with multi‑device scenes |
This table helps match control choices to installation scale and prevents compatibility surprises between strips, drivers, and controllers.
How Do Dimmable Drivers and Controllers Enhance Under‑Cabinet Lighting?
Matched dimmable drivers and controllers deliver smoother fades, less flicker, and lower energy use by regulating current and brightness precisely across LED runs. Properly paired systems avoid color shifts that can appear with mismatched dimmers and drivers—important for tunable white setups where Kelvin consistency matters across levels. Matched components also reduce stress on LED chips during power modulation, extending lifetime and reliability. Installers should confirm minimum load requirements and wiring topologies to maintain stable dimming and avoid issues like flicker or pop‑on behavior.
Testing compatibility and performance under expected loads before finalizing the install prevents in‑field surprises and makes scene control reliable for homeowners and commercial clients.
How Can You Integrate Smart Home Systems with LED Strip Lights?
Integrating strips into a smart home means selecting controllers certified for your platform and ensuring solid network connectivity and power. Wi‑Fi controllers are easy for voice and cloud features but can be affected by congestion; Zigbee and Z‑Wave offer more consistent local control and mesh scalability for multi‑zone kitchens. Use controllers that store scenes locally or expose APIs for fast response during network outages. Place controllers near reliable power, allow for heat dissipation, and prefer devices that report status and power use for troubleshooting and energy tracking.
Common automations include occupancy‑triggered under‑cabinet task lighting, time‑of‑day tunable white schedules, and coordinated scenes that sync under‑cabinet strips with island pendants and overhead fixtures. These integrations turn under‑cabinet strips into flexible elements of a modern kitchen lighting system.
What Are the Best Under‑Cabinet Lighting Ideas for Task and Accent Lighting in Kitchens?
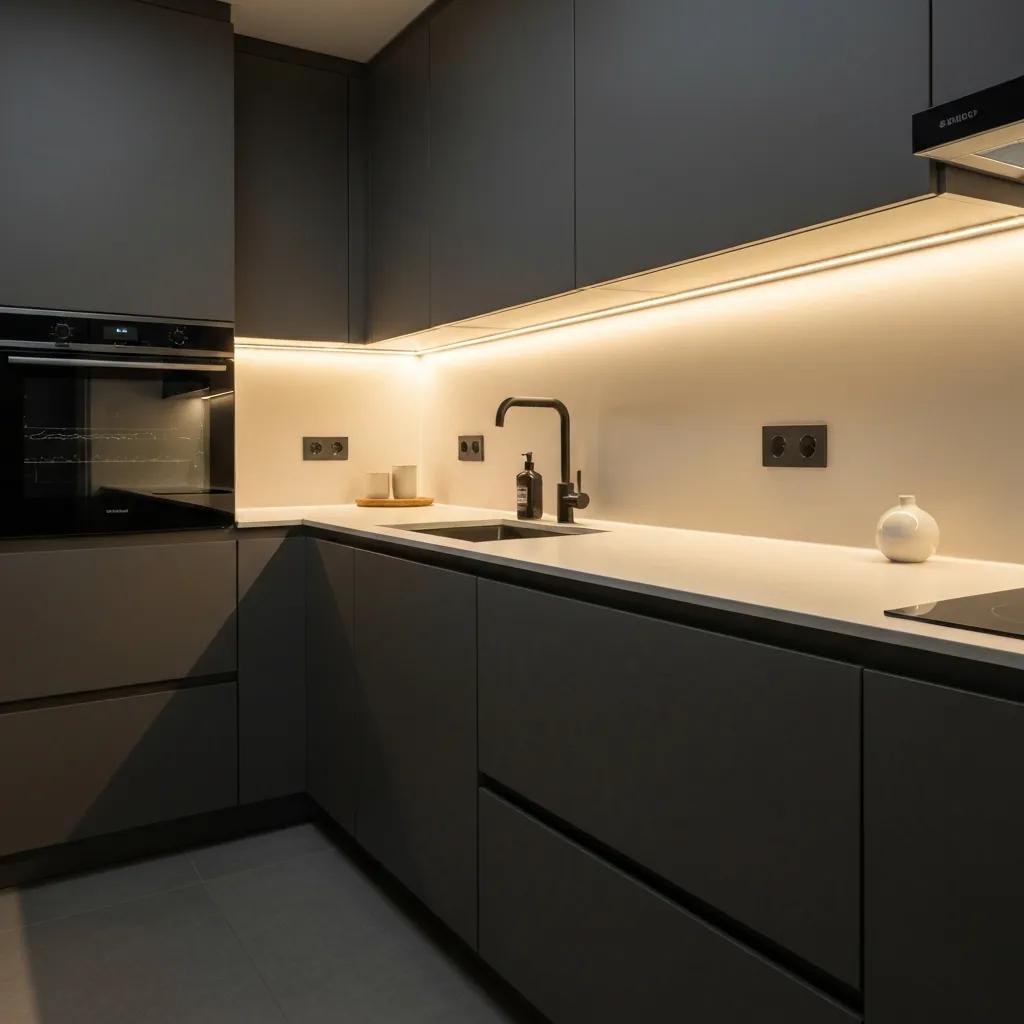
Under‑cabinet strips work for both task and accent lighting—use placement and lumen control to create layered lighting that balances visibility and ambiance. For task light, mount strips near the cabinet lip or front edge to reduce countertop shadows; aim the light to wash the surface rather than shine into the eyes. For accent lighting, hide COB strips behind overhangs or inside channels for a smooth glow that shows off backsplash texture and cabinet lines. Mixing task‑focused high‑density SMD with secondary COB accent runs gives flexible scenes for prep and entertaining without swapping fixtures.
Consider cabinet finishes and countertop reflectivity: darker wood and matte stone can benefit from slightly warmer Kelvin and higher lumen output, while glossy surfaces often need diffusion to tame specular highlights. These design choices lead into specific placement tactics installers can replicate.
Practical placement ideas:
- Toe‑kick lighting: Low‑output strips along the base create a floating‑cabinet look and soft floor glow.
- Back‑of‑shelf or in‑cabinet lighting: Low‑voltage strips inside cabinets and pantry shelves improve visibility for stored items.
- Overhang/valance accent: COB strips hidden behind the cabinet lip give a continuous, elegant wash on the backsplash.
How Do LED Strip Lights Improve Task Lighting on Kitchen Countertops?
Placing LED strips close to the cabinet front edge minimizes shadows from hands and utensils and provides uniform light along the work surface for chopping and reading recipes. Target 400–700 lumens per foot for primary prep zones to ensure clear visibility without harsh hotspots, and mount strips in diffused channels to reduce glare on glossy counters. A neutral 3000K–3500K with CRI ≥90 keeps colors accurate for food and finishes, improving safety and aesthetics. Correct wiring and driver selection preserve consistent output so the far end of the run isn’t noticeably dimmer.
These placements also reduce maintenance compared with puck lights or halogen fixtures and integrate cleanly into layered lighting schemes alongside ceiling and pendant fixtures.
What Are Popular Accent Lighting Techniques Using LED Strips Under Cabinets?
Accent techniques use lower lumen output and warmer Kelvin to create mood rather than bright task light, hiding strips and using diffusion so sources stay out of view. Install strips behind crown moldings or inside valances with opal diffusers for a halo effect on ceilings or backsplashes, and use 150–300 lumens per foot to highlight textures without competing with main lighting. Toe‑kick lighting on a dimmable circuit offers subtle night lighting and a visual base for cabinetry. For hidden reveals, tuck strips behind overhangs or in recessed channels so only a soft, even glow is visible—this keeps modern kitchens looking clean and uncluttered.
These accent runs complement task strips and let you build layered scenes that suit different activities and times of day, especially when tied into smart scene presets and dimming strategies.
Why Choose UL‑Listed and High‑Quality LED Strip Lights for Under‑Cabinet Lighting?
Safety, reliability, and predictable performance are the main reasons to specify UL‑listed and high‑quality strips and components for kitchens where heat, moisture, and human contact are common. UL‑listing shows components have passed electrical and thermal tests for safe operation, reducing failure risk and simplifying code compliance. High‑density, energy‑efficient strips deliver more lumens per watt, cutting operating costs and often reducing the number of runs needed while keeping color stability and lifespan consistent. Pros benefit from fewer callbacks and more consistent results when using certified components.
In practice, choosing UL‑listed drivers and strips lowers liability and improves compatibility with standard dimmers and controllers—leading to reliable dimming, tunable white performance, and predictable thermal behavior. Those quality choices also simplify warranty service for homeowners and contractors.
How Does UL‑Listing Ensure Safety and Performance in Kitchen Lighting?
UL‑listing requires components to pass defined electrical and thermal tests that mimic expected operating conditions, confirming that materials, wiring, and connectors handle rated loads without overheating or compromising insulation. For under‑cabinet installations, using a UL‑listed driver and UL‑recognized strip reduces the chance of thermal issues near cabinet materials and helps meet local electrical codes. UL testing also covers environmental protection where relevant—important when strips sit near steam or sinks. Specifying UL‑listed parts makes permitting easier and gives homeowners and professionals documented safety assurance.
These safety advantages make certified parts the sensible choice over commodity components, particularly for professional and commercial projects.
What Are the Benefits of High‑Density and Energy‑Efficient LED Strips?
High‑density strips produce more lumens per foot, allowing fewer runs or smaller drivers to reach the same task illumination—reducing energy use and wiring complexity. COB strips create a smoother light field that cuts perceived glare and can improve visual performance in open‑plan kitchens or when filming content. Energy‑efficient strips run cooler and degrade slower, extending useful life and lowering lifetime costs. For professionals, these efficiency gains translate to better ROI for clients and fewer service visits over the product lifetime.
Balancing density and diffusion lets you weigh initial cost against long‑term performance and client satisfaction, making quality strips a strong choice for both DIY and pro installs.
What Are Common FAQs About LED Strip Lights for Under‑Cabinet Lighting?
This FAQ answers the practical questions homeowners and installers ask most often: lumen targets, concealment techniques, and basic maintenance. Clear numeric targets, mounting options, and troubleshooting tips help avoid pitfalls like voltage drop, visible LED dots, or incompatible dimming that causes flicker or color shifts. For more detail, see the planning, driver selection, and smart integration sections above.
How Many Lumens Do You Need for Effective Under‑Cabinet Lighting?
For task‑focused under‑cabinet zones, aim for about 400–700 lumens per foot to give clear visibility for chopping and detailed tasks. Ambient or accent under‑cabinet lighting typically ranges from 150–300 lumens per foot for softer effects. Exact targets depend on countertop reflectivity, cabinet finish, and supplemental overhead lighting—darker surfaces often need more lumens. Prioritize CRI 90+ where accurate color rendering matters, and use wiring and driver strategies that maintain consistent lumens across the run to prevent dimming at the far end.
These numeric recommendations help size strips and drivers during planning and balance energy use with visual comfort.
How Do You Hide LED Strip Lights for a Clean Under‑Cabinet Look?
Concealment approaches include mounting strips in aluminum channels with opal diffusers, placing strips behind cabinet overhangs, or routing strips into recessed cabinet lips so the light source stays out of direct view. Diffusers smooth hotspots and create a uniform look; channels also act as heat sinks that improve reliability. For retrofit installs with limited depth, shallow channels or thin COB strips can achieve a hidden appearance without bulk. Good surface prep, strong mounting, and tidy cable routing deliver a clean, serviceable installation.
HitLights supplies UL‑listed LED strip options, drivers, mounting supplies, and contractor resources like power‑supply calculators and a Pro Program with dedicated support and professional pricing. HitLights is a source for certified parts and pro services. Shop HitLights to see product options and learn about the Pro Program.
Frequently Asked Questions
What are the advantages of using LED strip lights over traditional lighting options for under cabinets?
LED strip lights use less energy, last much longer, and produce less heat than incandescent or fluorescent alternatives. They can run for tens of thousands of hours, lowering replacement and operating costs. Their low heat output makes them safer near cabinetry, and their flexible format allows custom lengths and placements to suit a variety of cabinet designs—improving both function and appearance.
Can LED strip lights be cut to fit specific cabinet sizes?
Yes. Most LED strips include marked cut points so you can trim them without damaging the circuit—just cut only at the designated marks. After cutting, reconnect using approved connectors or soldering per the manufacturer’s instructions to maintain functionality.
How do I maintain and clean LED strip lights installed under cabinets?
Maintenance is simple: dust strips periodically with a soft, dry cloth. For grease or deeper cleaning, power down and wipe with a damp cloth and mild soap, then dry before restoring power. Avoid harsh chemicals or abrasive tools. Periodically inspect connections and mounting to ensure everything remains secure.
Are there any safety concerns when installing LED strip lights under cabinets?
LED strips are generally safe, but follow basic precautions: use UL‑listed components, secure wiring to prevent hazards, and avoid placing strips too close to direct heat sources or where constant moisture can reach them. Follow manufacturer instructions and local electrical codes to minimize risk.
What is the difference between RGB and single‑color LED strip lights?
RGB strips mix red, green, and blue channels to produce many colors and dynamic effects—good for mood lighting and scenes. Single‑color strips emit a fixed color temperature and typically offer better brightness and efficiency for task lighting, making them the preferred choice for under‑cabinet food prep areas.
Can I use LED strip lights outdoors, and what should I consider?
Yes—if you choose strips and power supplies rated for outdoor use. Look for appropriate IP ratings that indicate protection from water and dust, and make sure connectors and drivers are rated for outdoor conditions. Protect connections from direct exposure and mount strips in locations that avoid the worst weather when possible.
