- What Are LED Strip Lights?
- Can You Cut LED Strip Lights Without Damaging Them?
- Why Would You Want to Cut LED Strip Lights?
- Tools You Need to Cut and Reconnect LED Strip Lights
- How to Cut LED Strip Lights Step-by-Step
- Can You Reconnect Cut LED Strip Lights?
- Can You Cut Waterproof LED Strip Lights?
- Common Mistakes to Avoid When Cutting LED Strip Lights
- What Happens If You Cut LED Strips Incorrectly?
- Tips for Maintaining LED Strip Functionality After Cutting
- Conclusion: Yes, You Can Cut LED Strip Lights – If You Follow the Rules
LED strip lights have become a staple in modern home décor, ambient lighting, and DIY tech projects. But what happens when your roll of LED lights is just a little too long for your setup? If you're asking, "Can I cut LED strip lights?" — the short answer is yes, but it must be done correctly. In this guide, we’ll walk you through everything you need to know about cutting LED strip lights safely, preserving functionality, and customizing your lighting setup.
What Are LED Strip Lights?
LED strip lights, also known as LED tape lights or ribbon lights, are flexible circuit boards embedded with surface-mounted light-emitting diodes (SMD LEDs). They typically come with an adhesive backing, allowing easy installation on walls, furniture, ceilings, and even vehicles. Available in various colors, brightness levels, and voltages, LED strips are widely used for both decorative and functional lighting.
Understanding the structure of LED strips is essential before you consider modifying them.
Can You Cut LED Strip Lights Without Damaging Them?
Yes, you can cut LED strip lights, but only at designated points. Most LED strips are designed with pre-marked cutting lines—usually every 2 to 6 inches—depending on the type and density of the LEDs. These cut points are typically represented by a line with a small scissor icon or copper pads.
Cutting outside of these lines can permanently damage the strip or prevent it from working correctly. Therefore, precision is critical.
Why Would You Want to Cut LED Strip Lights?
- Custom Length Requirements: Fit a specific area like under a shelf or around a TV frame.
- Multiple Installation Areas: Divide one strip into sections for different zones in a room.
- Aesthetic Customization: Create patterns or intricate lighting designs.
- Functional Breaks: Reconfigure strips around corners or gaps.
Tools You Need to Cut and Reconnect LED Strip Lights
- Sharp scissors or a precision knife
- LED strip connectors (clip-on or solderable)
- Soldering iron (for permanent connections)
- Heat shrink tubing or electrical tape (for insulation)
- Multimeter (optional, for testing connectivity)
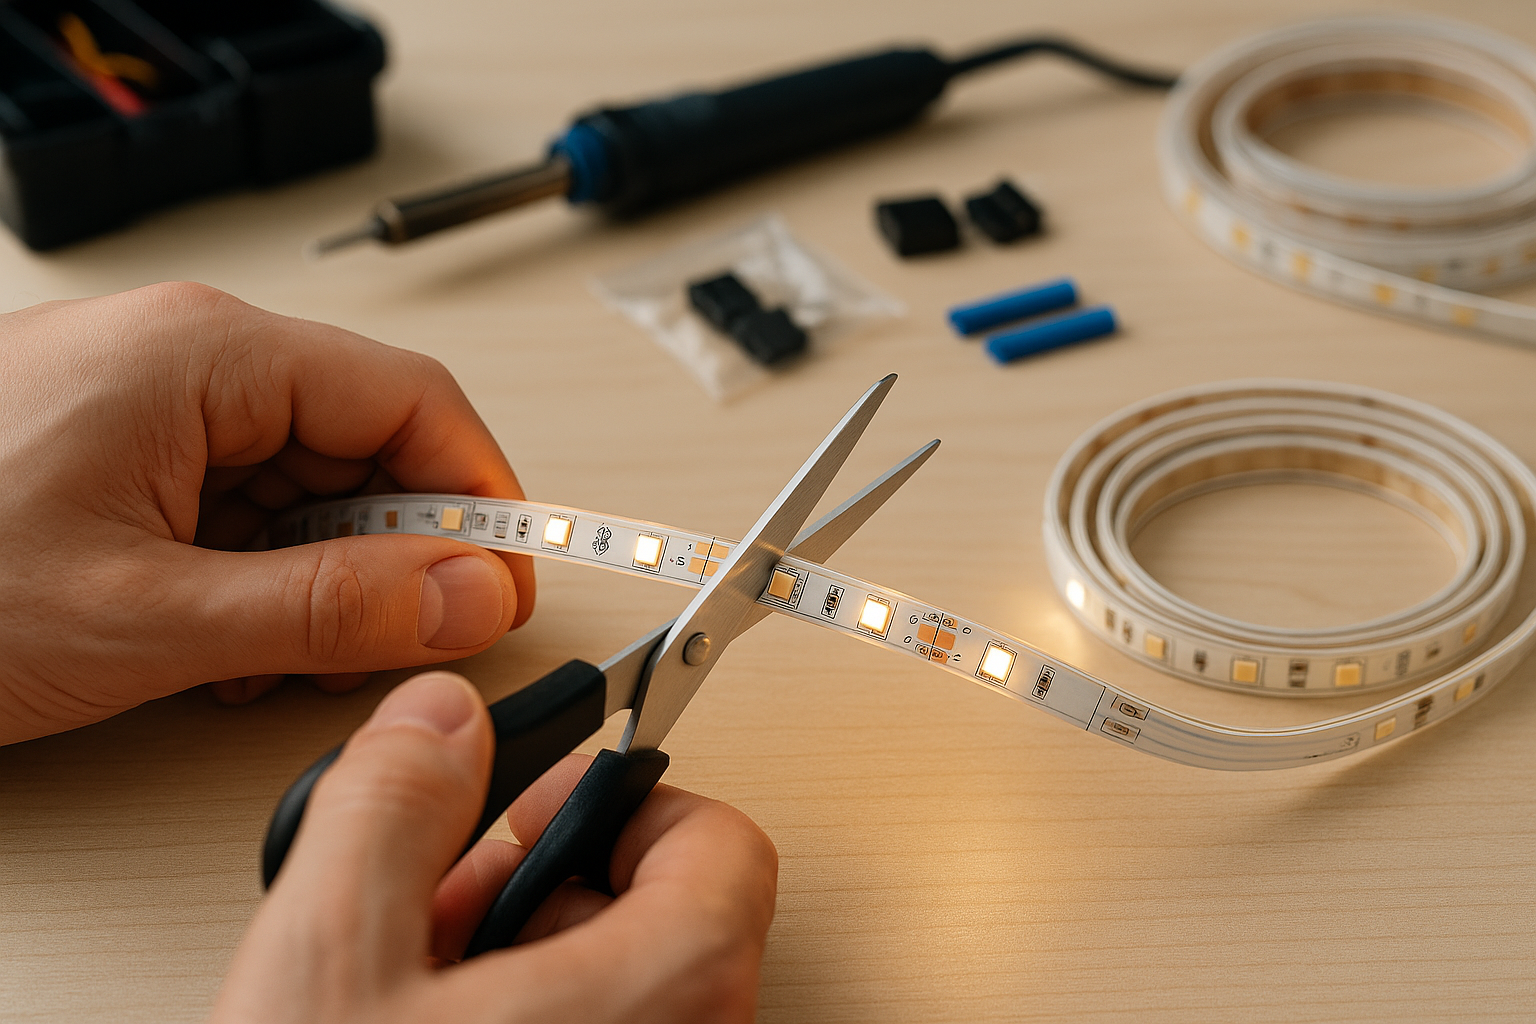
How to Cut LED Strip Lights Step-by-Step
1. Identify the Cut Lines
Look for the clearly marked cut lines on the strip. These are usually placed between copper solder pads. Never cut in the middle of an LED or an electronic component.
2. Power Off the Strip
Always disconnect power before cutting to avoid electric shock or short circuits.
3. Make a Clean Cut
Using sharp scissors or a precision knife, make a clean cut along the designated line. A jagged cut may damage the copper pad or cause connectivity issues.
4. Check the Polarity
If you plan to reconnect or extend the strip, note the + and - polarity markings on each end. Connecting strips with reversed polarity can prevent them from lighting up or cause damage.
Can You Reconnect Cut LED Strip Lights?
1. Using LED Strip Connectors
These are quick, solderless options available in various configurations—straight, angled, or T-shaped. You simply insert the cut ends into the connector and clamp them down.
- Pros: Easy to use, no soldering required.
- Cons: May be less durable over time, especially in outdoor or high-moisture environments.
2. Soldering Wires to the Strip
For a more permanent and robust connection, you can solder wires to the exposed copper pads on the strip.
- Pros: Strong, reliable, and better suited for long-term use.
- Cons: Requires tools and some experience.
Can You Cut Waterproof LED Strip Lights?
Yes, but with caution. Waterproof LED strips are usually coated with a silicone or epoxy resin that protects the circuitry. When cutting these:
- Cut through the resin layer and the strip at the marked line.
- Reseal the cut end using a waterproof cap and silicone sealant to prevent moisture ingress.
- Alternatively, purchase waterproof connectors designed for outdoor use.
Failing to reseal properly can lead to corrosion, short-circuiting, and strip failure, especially in outdoor applications.
Common Mistakes to Avoid When Cutting LED Strip Lights
- Cutting at the wrong spot: Always use the marked lines to preserve functionality.
- Skipping polarity checks: Reversed wiring can disable or damage the strip.
- Poor reconnection: Loose connections can cause flickering or complete failure.
- Ignoring insulation: Exposed wires or solder joints can short circuit or become fire hazards.
- Improper sealing (for waterproof strips): Unsealed ends can result in moisture damage.
What Happens If You Cut LED Strips Incorrectly?
Cutting LED strips improperly can lead to several issues:
- Loss of power to subsequent LEDs
- Dim or non-functioning segments
- Short circuits that could damage the power supply
- Complete failure of the strip
These problems can be costly and dangerous, especially if the strip is wired into a larger electrical system.
Tips for Maintaining LED Strip Functionality After Cutting
- Test the strip after cutting before final installation.
- Use heat shrink tubing for a clean, insulated finish.
- Ensure firm contact with connectors or solder joints.
- Label ends for easy identification of polarity when working with multiple pieces.
- Avoid bending the strip at sharp angles near cut points to prevent stress damage.
Conclusion: Yes, You Can Cut LED Strip Lights – If You Follow the Rules
So, can you cut LED strip lights? Yes—but with care, precision, and the right tools. Whether you're designing a custom lighting layout for your home, car, or workspace, knowing how to properly cut and reconnect LED strips can save time, money, and frustration. Always follow manufacturer guidelines, test before final installation, and when in doubt, consult with an electrician or lighting specialist.
Customizing your lighting should be empowering, not intimidating. With the right approach, LED strip lights can be tailored to fit virtually any space or aesthetic.
