- How strip to strip connectors work" href="#span-style-font-weight-400-how-strip-to-strip-connectors-work-span">How strip to strip connectors work
- When not to use strip to strip connectors" href="#span-style-font-weight-400-when-not-to-use-strip-to-strip-connectors-span">When not to use strip to strip connectors
- What are the other options?
" href="#span-style-font-weight-400-what-are-the-other-options-span-span-style-font-weight-400-br-span-span-style-font-weight-400-span"> What are the other options?
- Soldering tips" href="#span-style-font-weight-400-soldering-tips-span">Soldering tips
“Are those solderless strip connectors any good?” We get this question pretty often, and as our COO Jason likes to say - “Well, it depends.” This week’s blog takes a look at our strip to strip connectors, what makes them work, and makes some recommendations on when you might or might not want to use them - and what the alternatives are.
How strip to strip connectors work
For electricity to flow, it must have a continuous path from one conductive material to the next. If two conductors (like wires or LED strips) are not touching, no electricity will flow; if they’re connected by a conductive material or touching directly, the circuit is completed and current will flow.
The material an LED strip is made of is called PCB, or printed circuit board. Traditionally, the only way to make an electrical connection to PCB is by soldering. Soldering is not particularly hard, once you get the hang of it, but it can be time consuming - and requires special tools and materials (soldering iron and solder at a minimum). Your trade off for this effort, however, is a strong and permanent electrical connection.
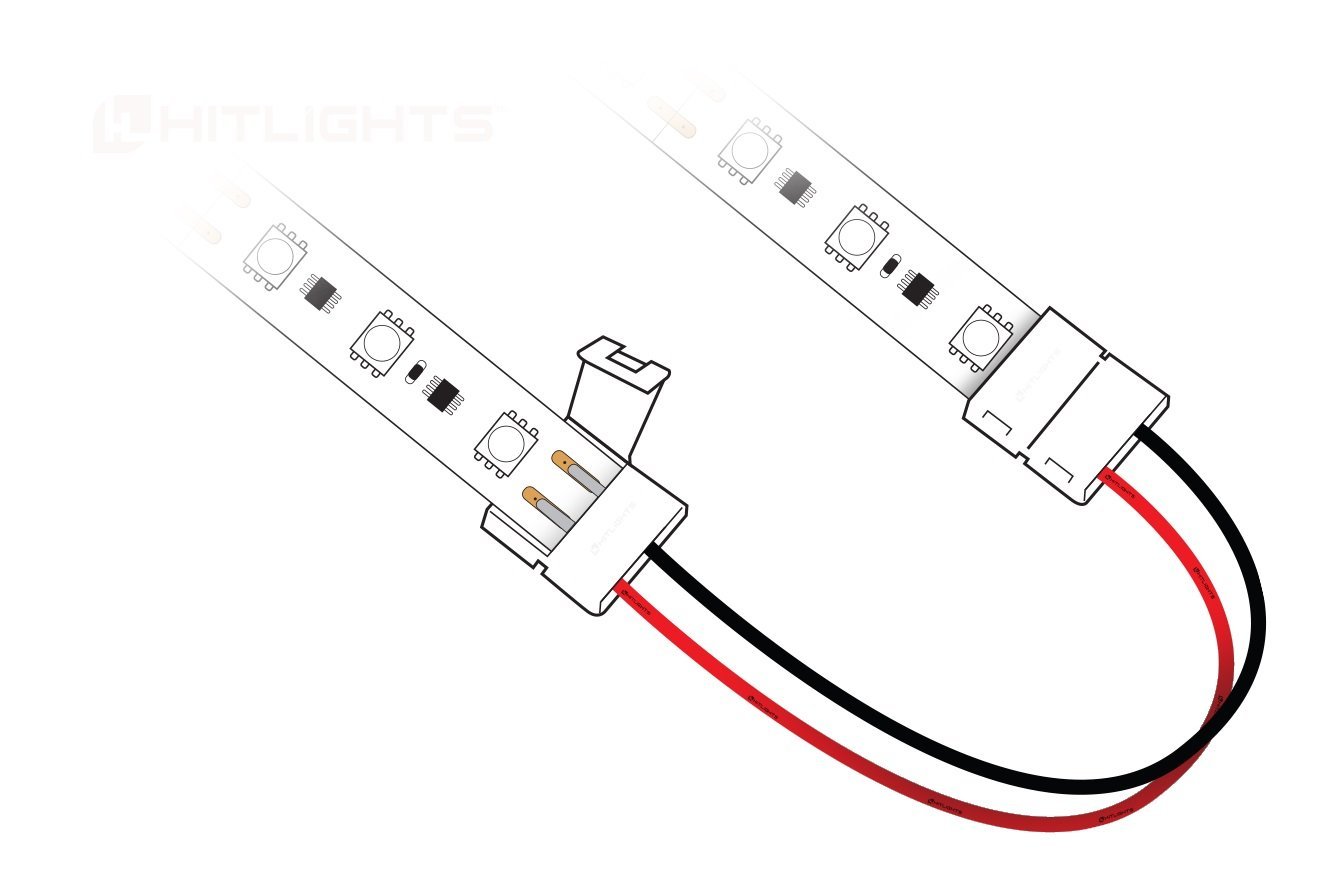
Solderless strip connectors are designed to allow you to make solderless connections to LED strip lights. They work by inserting the strip into the below connectors. The contact pads on the strip slide underneath the contact prongs on the connector, completing the electrical circuit. When closed, the connector clasp holds the strip in place.
Do the connectors work? That’s a tough question. Depending on your application, our connectors work ‘most of the time’, ‘some of the time’, or ‘none of the time’. In the next section we’ll figure out which of of the above applies to your application.
When not to use strip to strip connectors
Soldereless strip connectors do NOT make a permanent electrical connection with the strip light. While the teeth on the clasp do an okay job keeping the strip in place, movement is still possible - and if there’s a lot of it it’s likely that the contact pads can move away from the contact prongs and lose connection.
These connections are also exposed to the elements, so if your strip and connectors are installed outside, moisture or rain can penetrate them, causing the contacts to corrode, short, or otherwise fail.
Below, Wayne and Caleb explain some common connector issues, and how you can solve them :
With the above things in mind, here’s when NOT to use strip to strip connectors.
- When your LED strips might be subjected to movement - as in installations on cars, boats, or other vehicles; or in installations that might be installed or set up several times, such as portable shelving or displays
- When you have a large number of connections to make - particularly in installations that require many connections back to back, where one failure would result in the loss of large sections of light
- When you are installing outside or anywhere exposed to the elements - where water or moisture might affect the performance of the connectors
- When you’re installing in tight places - when the added size of the connector would make your LED strip installation difficult or impossible
- When your connectors absolutely MUST NOT fail - as in connectors installed in hard to reach places, in products or installations you’re delivering or shipping to a customer, or even in homes you’re working on that you’d just rather not have to go back to
What are the other options?
First - evaluate your installation to determine if you need to make connections - and figure out how to minimize the number of connections you need to make. If you do need to make connections, always aim to make them in parallel (connecting each area back to the power source) instead of in series (connecting each area back to back). Connecting in parallel means that if one connection fails, the others remain lit.
Second - solder your connections. If it absolutely has to work, there is no substitute for soldered connections. If you’re an LED lighting professional or if you aspire to be one, then there is no substitute for a permanent soldered connection.
Soldering tips
In short, here are the basics in successfully soldering wire to an LED light strip.
- Make clean cuts on both the LED strip and the wire
- Strip the wire smoothly, don’t leave any stray wire pieces
- Pre-tin both the wire and the LED strip before you make the connection
- Avoid spreading solder between contacts and causing a short
- Always finish off your connection with heat shrink tubing - particularly if you’re installing outdoors
- If you’re having trouble with soldering directly to wire, you can always use our connectors and solder the contact prong to the pad. This gives you the best of both worlds - the permanent connection of soldering with the ease of use of a connector.
Let our friend Elliot explain below a little further below :

1 comment
Sam Andrews
Nice! I salute you for explaining how heat shrink tubing can be a great method of completing the connection between soldered wires and LED light strips. I should probably tell my cousin about this so he can call the right technician. He plans to install some LED lights in his backyard this weekend. https://tefcap.com/heat-shrinkable-tubing/