
Table of Content
Introduction
In LED lighting, that extra something is always in the details that make for a more professional or pleasing finish. An overlooked area is the installation of LED strips in turning corners. Clean and seamless cornering enhances the overall project look, avoids unsightly light leakage, and creates uniform lighting. Electricians, LED installers, custom fabricators, and event planners must learn the skill of cornering techniques for delivering top-quality products. This article will serve as a guide on all the cornering methods, allowing you to create seamless designs.
Planning Your LED Installation
Before tackling any corner, meticulous planning is key. This includes accurate measurements and a clear understanding of the corner type you’re working with.
- Measuring Accurately: Precise measurements are crucial for a seamless fit. Use a flexible measuring tape to follow the exact path the LED strip will take, noting the lengths of each segment leading up to and away from the corner. Remember to account for any gaps or overlaps required by your chosen connection method. A survey by the National Electrical Contractors Association (NECA) found that measurement errors account for 15% of electrical installation rework, highlighting the importance of precision.
- Corner Types and Considerations: Corners come in various forms – 90-degree inside and outside corners, acute angles, and obtuse angles. Identify the type of corner you're dealing with as it will dictate the appropriate installation method. For example, a sharp inside corner might necessitate a flexible LED strip, while a standard 90-degree corner can be easily managed with a corner connector. Consider the material the corner is made of (wood, metal, drywall) as this will influence your mounting options.
Corner Installation Methods
Two primary methods exist for navigating corners with LED strips: using corner connectors and using flexible LED strips.
Using Corner Connectors:Types of Corner Connectors: Corner connectors are pre-fabricated components designed to simplify the cornering process. They come in various shapes and sizes to accommodate different LED strip widths and corner angles (typically 90 degrees). Common types include L-shaped, T-shaped, and cross-shaped connectors. Choose a connector compatible with your LED strip’s density (e.g., 30 LEDs/meter, 60 LEDs/meter) and voltage (12V or 24V).
Installation Steps for Corner Connectors:
Measure and cut the LED strip at the designated cut points, ensuring a clean, perpendicular cut.
Peel back the protective backing on the adhesive strip inside the connector.
Carefully align and insert the LED strip ends into the connector, ensuring proper contact with the copper pads.
Secure the connector to the mounting surface using the provided adhesive or screws.
Using Flexible LED Strips:
Bending Radius and Best Practices: Flexible LED strips are designed to bend, but they have a minimum bending radius. Exceeding this radius can damage the internal circuitry and LEDs. Consult the manufacturer's specifications for the recommended bending radius. When bending, avoid sharp creases and ensure the bend is smooth and gradual.
Installation Steps for Flexible Strips:
Measure and cut the LED strip at the designated cut points.
Carefully bend the strip around the corner, maintaining a smooth curve within the specified bending radius.
Secure the strip to the mounting surface using the adhesive backing or other mounting clips. For added stability, consider using additional adhesive or silicone in high-stress areas.
 |

|
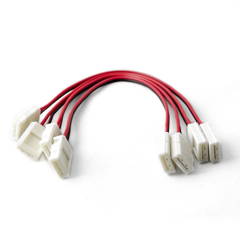
Examples of LED strip connectors
Troubleshooting Common Cornering Issues
Uneven Brightness: This can indicate a poor connection between the LED strip and the connector or a damaged section of the strip. Check the connections and retest. If the issue persists, replace the affected strip section.
Light Leakage: Light leakage at the corner can be caused by improper alignment of the LED strip within the connector or insufficient bending radius when using flexible strips. Adjust the strip's position or increase the bending radius to resolve the issue.
Intermittent Flickering: Flickering usually indicates a loose connection or a faulty power supply. Double-check all connections and ensure the power supply is adequately rated for the total wattage of the LED strips.
Choosing the Right LED Strip and Accessories
Selecting the appropriate LED strip and accessories is crucial for optimal performance and longevity.
LED Strip Density: Higher density strips (more LEDs per meter) offer greater brightness and smoother light distribution, making them ideal for applications requiring uniform illumination.
Voltage: 12V strips are commonly used for smaller projects, while 24V strips are preferred for longer runs due to reduced voltage drop.
IP Rating: The Ingress Protection (IP) rating indicates the level of protection against dust and moisture. Choose an IP rating appropriate for the installation environment (e.g., IP65 for outdoor applications).
Safety Considerations
Power Supply: Always use a power supply that meets the voltage and wattage requirements of your LED strips. Overloading the power supply can lead to overheating and potential fire hazards.
Wiring: Ensure all wiring connections are secure and properly insulated. Follow local electrical codes and regulations.
Ventilation: Provide adequate ventilation for power supplies and other components to prevent overheating.
Conclusion
Learn how to corner LED strips; it's a skill everyone needs to possess if he or she is to be a professional in LED lighting. Take on all the techniques and select the best fittings available, and follow the best practices, and you will make seamless installations that will beautify any project from booth displays at trade shows to architectural lighting and custom cabinetry. Cornering is vital for professional results as well as impressing the clients by achieving greater precision. Remember careful planning, accurate measurements, and meticulous attention to detail will form the core around which your successful installations will revolve.
Read more about the Common Pitfalls to Avoid When Installing LED Strip Lights Around Corners.
About HitLights:
HitLights is a leading provider of high-quality LED lighting and low voltage LED drivers, and mounting supplies catering to diverse needs in residential, commercial, and event settings. With a commitment to innovation, eco-friendly lighting, and customer satisfaction, HitLights continues to illuminate spaces with innovations be it micro or macro technology.
By the way, if you are a professional installer, an integrator, or a business owner and you want to: Save MORE! And Do MORE Projects!
Get Factory Direct Pricing when you join our Professional Partner Program RISK-FREE, NO CONTRACTS, NO HASSLE PROCESS there is nothing to lose but MORE to GAIN!
If you have any additional questions, feel free to reach out to us at customerservice@hitlights.com or give us a call at 1 (855) 768-4135. Our team of expert engineers and electricians are here to assist you every step of the way!
*Disclaimer: The information provided in this article is for general informational purposes only.
